5 essential preparations to make before assembling magnetic tiles : Understand the base, light source, and safe zone all at once.

Why does “preparation before assembling” determine the upper limit of magnetic tiles ?
Many parents and teachers, when letting children play with magnetic tiles , often focus entirely on “how to assemble,” “what shape to create,” and “which set is more expensive and bigger,” neglecting a crucial question: have you truly prepared before starting to build? Magnetic tiles are not ordinary building blocks; they involve three aspects simultaneously: structural stability, lighting effects, and children’s safety. If preparation is inadequate beforehand, problems such as collapse, dull colors, distraction, and even safety hazards will arise during the subsequent building process. The so-called “poor assembling” is often not due to a lack of ability on the part of the child, but rather to incorrect environmental conditions set up from the outset.
magnetic tiles lies in the moment when “light passes through the structure.” When colors are illuminated and spatial relationships are revealed, children can truly understand the relationships between two-dimensional and three-dimensional planes, interior and exterior, and structure and support. Therefore, preparation before building is not an optional extra, but rather the starting point of the entire learning experience. Only when the base is stable, the light source is appropriate, and the safe zone is clearly defined can magnetic tiles evolve from a “toy” into a true tool for spatial awareness.
The first key preparation: a stable and “neutral” building base.
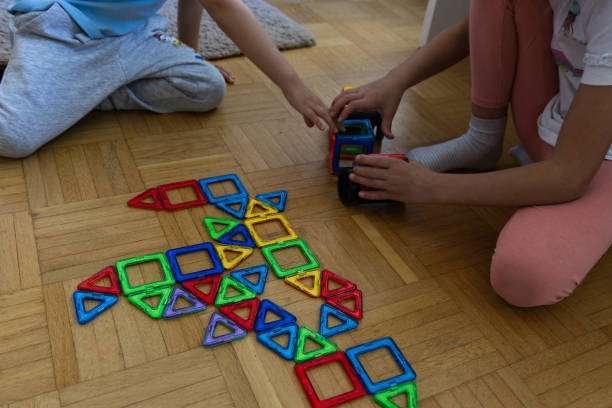
In all the preparation work, the base is often the most easily overlooked part. Many people are used to assembling magnetic tiles directly on carpets, beds, sofas, or even directly on their children’s laps . The result is that the structure cannot stand up, the magnetic connection angle is limited, and the child keeps repeating the ineffective cycle of “holding on,” “falling over,” and “trying again.” The magnetic force of magnetic tiles is directional, and they need a relatively flat, hard supporting surface that does not interfere with the magnetic force to form a stable geometric relationship.
An ideal base should have two characteristics. First, it should be flat and not collapse. Wooden tabletops, hard plastic tabletops, or dedicated puzzle boards all work, while soft pads and carpets absorb pressure, causing the angles between the magnetic tiles to constantly change slightly. Second, the color and material should be as neutral as possible. Overly fancy tablecloths and complex patterned puzzle mats can visually interfere with the color perception of magnetic tiles , making it difficult for children to distinguish structural boundaries. A simple, clean base color, on the other hand, allows the colors and shapes of the stained glass windows to become the visual focus.
More importantly, the base serves as a psychological boundary for safety. When children realize that “as long as they build within this range, the structure is stable,” they are more willing to attempt tall towers, large spans, or complex combinations. A stable base essentially provides confidence for exploratory behavior.
The second key preparation: Choosing a light source that makes light a “participant”.
magnetic tiles and ordinary magnetic tiles lies in their dependence on light. Without a suitable light source, stained glass windows are just translucent plastic sheets with dull colors and blurred layers, greatly diminishing the sense of accomplishment from building them. Many people mistakenly believe that any light is sufficient, but in reality, the direction, intensity, and stability of the light source directly affect a child’s observation experience.
the tiles near a window allows sunlight to filter through , creating soft and realistic color variations. As the angle of light changes over time, the color blocks within the structure also change, offering an implicit lesson about time and space. However, it’s important to note that direct, strong light can cause glare and a feeling of heat, making children uncomfortable. Therefore, a bright but not excessively direct natural light environment is most suitable.
In situations where natural light is insufficient, artificial light sources become especially important. Stable, continuous, flicker-free white or warm white light is the ideal partner for magnetic tiles . The light source should ideally be positioned slightly below or parallel to the tile structure, allowing light to penetrate the sides and interior, rather than simply illuminating the surface from above. When light truly enters the structure, children can see the new colors created by overlapping and blending different colors. This “discovery” experience is the core of the educational value of magnetic tiles .
The third key preparation: Clear and perceptible security zone setup
magnetic tiles often involves standing, bending over, moving, and stretching. If the boundaries of the activity area are unclear, children can easily ignore their surroundings while focusing on building, leading to risks such as bumps, trampling, or even swallowing parts. Therefore, clearly defining a safe area before starting to build is to protect children’s freedom to explore, not to restrict it.
A safe zone, in essence, is first and foremost a physical concept. It represents a specific area within which there are no sharp furniture edges or corners. Sharp furniture edges and corners are potential safety hazards for children, potentially causing accidental bumps and injuries during play. Additionally, this area should not have slippery carpets or rugs. Slippery carpets not only could cause children to slip and fall while walking, but they could also affect their stability during the building process.
Furthermore, there should be no potential distractions such as drinks or snacks. Spilled drinks could soil the artwork, while snacks could distract children and prevent them from focusing on building. The space should be spacious enough to allow children to move freely around their artwork.
Children may need to observe their creations from different angles during the building process. Free movement allows them to do this without constantly having to overcome obstacles. Frequently crossing obstacles not only interrupts a child’s train of thought but can also cause them to accidentally knock over their creations. Only when the environment is clean and open can a child’s attention remain focused on the structure itself, allowing them to complete their project more attentively.
At the same time, the safe zone is not just limited to the physical realm; it is also a psychological concept. When children clearly know in their hearts that “this is an area where they can try boldly, where they can fail, and where they will not be immediately stopped,” they will be more courageous in undertaking complex endeavors.
In this safe psychological environment, children don’t need to worry about being criticized or blamed for failing at their attempts, allowing them to more freely unleash their imagination and creativity. For younger children, parents can help them gradually internalize this sense of security by designating specific building areas. These designated areas foster a sense of familiarity and belonging, and over time, children will feel safe and comfortable in these areas, developing good spatial habits and knowing that they can freely engage in building activities within them.
The fourth key preparation: “fuzzy setting” of the assembly goal.
Many adults, when helping children build magnetic tiles , tend to give a clear goal from the start, such as “Let’s build a castle” or “Let’s follow the instructions.” This approach isn’t wrong, but in the preparation stage before building, it’s more important to give children a sense of direction rather than limiting the outcome. Preparing a building goal doesn’t mean determining the finished product, but rather clarifying the theme of exploration.
For example, you can tell your child in advance that today they will try to “make the structure stand taller,” “let the light pass through the middle,” and “use the fewest pieces to create a shape that can stand up.” Such goals are open-ended and do not limit the specific shape, but they can guide children to focus on structure, stability, and the effects of light. When the goal is vague and abstract, children’s creativity is more easily activated.
This kind of goal-oriented preparation also helps children adjust their strategies when they fail, rather than simply starting over. They will gradually realize that building is not a random stacking of pieces, but a process of trial and error.
The fifth key preparation: allocating time and rhythm for assembly.
magnetic tiles is never something that can be completed in five minutes. Many failed attempts are not due to structural problems, but rather to frequent interruptions. Allowing sufficient, uninterrupted time before starting to build is a sign of respect for a child’s concentration. A building process that is constantly rushed and could end at any moment is unlikely to produce truly complex works.
Ideally, building time should include stages of trial and error, failure, observation, and adjustment. When children know they don’t need to rush to finish, they are more willing to slow down and observe changes in light, structural stability, and color combinations. This rhythmic preparation transforms magnetic tiles from a “time-consuming toy” into an “immersive learning experience.”
Conclusion: With proper preparation, the actual building can begin.
magnetic tiles lies not entirely in the complexity of the shapes created, but in whether children understand the relationship between space, structure, and light during the process. And all of this is built upon preparation before the building begins. A stable base is provided by magnetic tiles. Provide confidence, suitable lighting to bring colors to life, clearly defined safe zones to protect the freedom of exploration, open goals to inspire creativity, and ample time to allow for reflection. Only when these five preparations are in place can the actual assembly truly begin.
FAQ
magnetic tiles have to be assembled on a table? Can they be assembled on the floor?
As long as the floor is flat, hard, and not slippery enough, they can be assembled on the floor. However, soft materials such as carpets should be avoided, as they will affect the structural stability and the connection angle of the magnetic tiles.
Why do the same set of magnetic tiles produce vastly different effects when laid out in different locations?
The main reason usually lies in the differences in light sources and bases. The intensity and direction of light directly affect color presentation, while the flatness of the base determines the stability of the structure.
Should you demonstrate the specific shape to your child beforehand?
Whether or not to demonstrate depends on the child’s age and experience. For beginners, simply demonstrating the connection method is sufficient; there’s no need to limit the final shape. Leaving room for exploration is more conducive to skill development.