Magnetic Tiles: 5 Advanced Techniques for Creative Lighting – Deadly Lighting Techniques from the Desktop to the Window

Why is lighting and shadow the real “hidden challenge” in magnetic tiles ?
When many people first encounter magnetic tiles , they focus on “what shapes to build,” “how high to build,” and “whether they can stand steadily.” But as they progress through the building process, you’ll find that the novelty of the shapes themselves quickly fades. What truly draws children back to magnetic tiles isn’t the structure, but the light.
Magnetic tiles are not merely structural toys; they are more like an underrated tool for creating light and shadow. Color is not static; it must be activated by light. Space is not static either; a change in the direction of light completely alters the visual effect of the structure. Magnetic tiles truly enter an advanced stage of play when you begin to incorporate “how the light enters,” “where the light exits,” and “what blocks the light” into your creative process.
The five light and shadow creation techniques below are not as superficial as simply changing positions; they involve the comprehensive application of light source height, angle of incidence, background material, and spatial depth. Once you understand these techniques, magnetic tiles will transform from a desktop toy into a light and shadow experimental field that you can explore repeatedly.
The first advanced technique: Low-angle side lighting on the desktop to make the colors “stand up”.
Most people are used to placing magnetic tiles in the center of the table and lighting them from above. While this lighting method is clear, it’s very “flat,” making the colors appear to float on the surface and failing to create spatial depth. The real turning point comes when you move the light source from high to low, from directly above to the side.
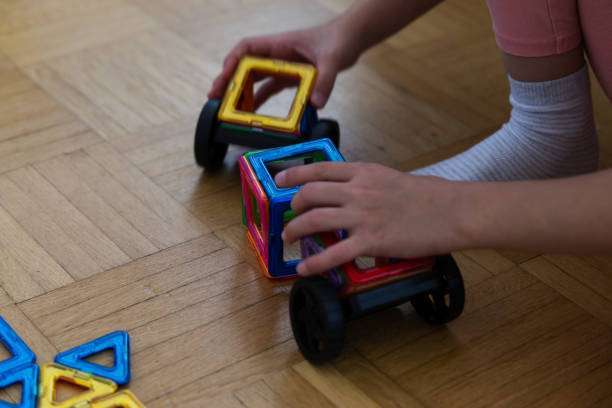
When light enters the structure at a low angle close to the tabletop, each edge of the magnetic tiles casts a distinct shadow, and the color no longer appears as a single surface but begins to have depth. A child will notice for the first time that the same red magnetic tile can appear as deep red, orange-red, or even almost brown at different angles. This isn’t due to a change in material, but rather the result of light being filtered and blocked multiple times within the structure.
This method is particularly suitable for enclosed or semi-enclosed structures. Low-angle side lighting creates a clear contrast between light and shadow in the interior space, allowing children to clearly see which areas are “lit” and which areas are “blocked.” This is the best entry point for understanding the principles of rectilinear propagation and occlusion of light, and it requires absolutely no explanation.
The second advanced technique: using tabletop reflective lighting to make the light “return” to its source.
Once children are familiar with the effects of direct sunlight, a factor that is often overlooked can be introduced: reflection. Many people don’t realize that the performance of magnetic tiles on a tabletop largely depends on the material and color of the tabletop.
When you place your assembled structure on a light-colored, smooth tabletop and shine light on it from above or the side, the light is reflected back to the bottom of the structure. You’ll then see a very interesting phenomenon: areas that should be in shadow are suddenly “lit up,” and the colors become softer. This secondary reflection of light makes the structure appear more three-dimensional and closer to the light and shadow effects of real architecture in its natural environment.
Through this play, children gradually realize that light doesn’t only have one path. It can be reflected, refracted, and reused. Many children at this stage will start actively adjusting the angle of the magnetic tiles, trying to “catch” the reflected light. This is actually a very advanced concept of light and shadow design, only it happens during play.
The third advanced technique: layering multiple colors to allow light to pass through, creating a “mutual contamination” effect.
The most easily underestimated ability of magnetic tiles is color layering. In many beginner games, children simply place different colors side by side, rarely intentionally making them overlap. But when you start consciously layering multiple colors, the depth of your light and shadow creations immediately rises to a new level.
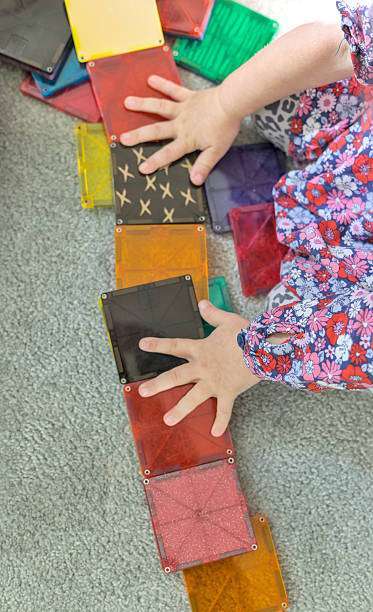
When two magnetic tiles of different colors overlap along the path of light, children are amazed to see a so-called “third color” appear. Specifically, when blue and yellow magnetic tiles overlap, green is produced; and when red and blue magnetic tiles overlap, purple is created.
It’s important to note that this phenomenon is entirely different from the mixing of paints we see in everyday life; it actually falls under the category of optical color mixing. Magnetic tiles present this amazing phenomenon in a very intuitive way, allowing children to encounter the basic principles of color superposition naturally and effortlessly.
A more advanced way to play involves controlling the number and order of the layers. When three or even four layers of magnetic tiles are involved in light transmission simultaneously, the color becomes deeper, even approaching black. This sparks children’s strong curiosity, prompting them to actively think about questions like, “Is the light being blocked?” or “Is the light unable to get out?” This kind of thinking essentially involves the issues of light intensity attenuation and transmittance.
The fourth advanced approach: Creating with natural light by the window, making time a variable.
If desktop lighting is about controlling light, then window lighting is about dancing with light. The most distinctive feature of natural light is not its intensity, but its change. Throughout the day, the angle, color, and contrast of light constantly change, and magnetic tiles are the perfect tool to capture these changes.
When you gently and carefully move the magnetic tiles to the window, children will quickly notice with their keen senses that the same magnetic tiles present completely different effects at different times of day, such as morning, noon, and evening.
In the morning, the soft, slightly cool light slowly falls, making the overall colors appear exceptionally clear, as if carefully calibrated by nature; at noon, the strong sunlight shines directly down, casting shadows with sharp edges as if cut by a knife; and in the evening, the light enters the room at a low angle, bathing the entire space in warm tones, and the shadows are stretched long.
The greatest value of this unique approach lies in its clever introduction of the crucial variable of “time.” As children observe the changing effects of magnetic tiles over time, they gradually realize that their creations are not fixed or static, but rather change with the environment. This seemingly simple cognitive process is actually an indispensable lesson in artistic creation and a vital component in cultivating children’s scientific observation skills.
The fifth advanced technique: background control and image projection, allowing the artwork to transcend its structure.
Once children have developed some control over light, the final advanced way to play is to shift their attention from the structure itself to the images it projects. Magnetic tiles can not only be seen, but also “projected.”
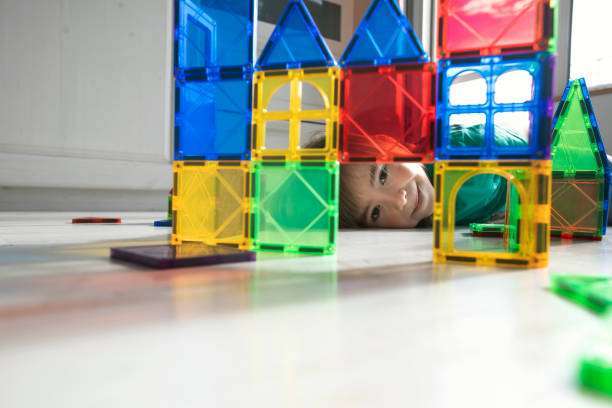
When you deliberately place a pristine white wall, a smooth sheet of white paper, or a light-colored fabric behind magnetic tiles, and cleverly allow light to shine from behind the tile structure, you’ll be pleasantly surprised to find that children will clearly see a magnified, vibrant, colorful image. At this moment, the magnetic tile structure itself is no longer the most eye-catching element; it takes a backseat. The truly striking element becomes the white wall, white paper, or light-colored fabric serving as the background.
This fun and engaging way of projecting images subtly guides children to think in reverse about structural design. Previously, when faced with structures built from magnetic tiles, they would simply ask, “Does this look good?” Now, their thinking shifts; they begin to ask, “Will the shadow be more beautiful?”
To achieve the desired effect, children actively adjust the height of the magnetic tile structure, the spacing between different parts, and the angles of their placement. This process of working backward from the final result to deduce the design solution is actually a very advanced form of creative thinking.
Conclusion: When light becomes a material, magnetic tiles are no longer just toys.
When you carefully and meticulously review these five unique ways of playing with light and shadow, you’ll be pleasantly surprised to discover a striking commonality: the structure is merely a vehicle, while the core material that truly plays a crucial role in creation is light. The reason magnetic tiles stand out among so many toys and objects is that they endow light with special properties, making it not only visible and directly presented to people, but also manipulable. People can control it according to their own ideas and repeatedly experiment and explore it.
Starting with the basic and somewhat limited method of playing with magnetic tiles using low-angle sidelight on a tabletop, which creates unique light and shadow effects and allows objects to take on different shapes; then moving on to the rich and varied light and shadow experiences brought about by the ever-changing natural light from a window, which varies endlessly with time and weather, presenting different scenes at every moment; and finally to the spatial extension effect brought by image projection, which can extend light and shadow into a wider space and create a magical visual experience.
Each upgrade in play is not just a change in the play itself, but also a significant leap in cognitive level. When children no longer passively receive the effects of light, but begin to actively adjust the angle, intensity, and other parameters of the light, it means that magnetic tiles… It has successfully completed a magnificent transformation from an ordinary toy into a creative tool.
FAQ
Do you need specialized lighting fixtures to create light and shadow effects?
No. Stable table lamps, floor lamps, and even natural light can all be effective light sources; the key is controlling the angle and position.
Is it normal for children to only focus on colors and not on changes in light?
Absolutely. Color is the first gateway to the world of light and shadow; as their experience deepens, their attention will naturally turn to the light itself.
Will window-side activities be too affected by the weather?
It is precisely the changes in weather that make window-side activities even more valuable. The differences between cloudy days, sunny days, and evenings are themselves the most realistic teaching materials on light and shadow.